
prerequisites to install Ubuntu on a UEFI system.
- Ubuntu ISO burned to a USB or DVD
- Windows backup (optional)
- Windows 10 bootable USB (optional yet recommended as it will save your day if anything goes wrong)
Step 1: Make a backup
It is always nice to make a back up, just in case if you mess up with the system.
Step 2: Create a live USB/disk of Ubuntu
The next thing you need to do is to create a live USB or disk.
Requirements:
- A 4GB or larger USB flash drive
- Windows 10 OS
- Rufus, a free and open source USB stick writing tool (https://github.com/pbatard/rufus/releases/download/v3.13/rufus-3.13.exe)
- An Ubuntu ISO file (http://releases.ubuntu.com/20.04/)
USB selection:
Perform the following to configure your USB device in Rufus:
- Launch Rufus
- Insert your USB stick
- Rufus will update to set the device within the Device field
- If the Device selected is incorrect (perhaps you have multiple USB storage devices), select the correct one from the device field’s drop-down menu

Boot selection and Partition scheme:
Now choose the Boot selection. Choices will be Non bootable and FreeDOS. Since you are creating a bootable Ubuntu device select FreeDOS. The default selections for Partition scheme (MBR) and Target system (BIOS (or UEFI-CSM)) are appropriate (and are the only options available).

Select the Ubuntu ISO file:
To select the Ubuntu ISO file you downloaded previously, click the SELECT to the right of “Boot selection”. If this is the only ISO file present in the Downloads folder you will only see one file listed. Select the appropriate ISO file and click on Open.

Write the ISO:
The Volume label will be updated to reflect the ISO selected. Leave all other parameters with their default values and click START to initiate the write process.

Additional downloads:
You may be alerted that Rufus requires additional files to complete writing the ISO. If this dialog box appears, select Yes to continue.

Write warnings:
You will then be alerted that Rufus has detected that the Ubuntu ISO is an ISOHybrid image. This means the same image file can be used as the source for both a DVD and a USB stick without requiring conversion. Keep Write in ISO Image mode selected and click on OK to continue.

Rufus will also warn you that all data on your selected USB device is about to be destroyed. This is a good moment to double check you’ve selected the correct device before clicking OK when you’re confident you have.

Writing the ISO:
The ISO will now be written to your USB stick, and the progress bar in Rufus will give you some indication of where you are in the process. With a reasonably modern machine, this should take around 10 minutes. Total elapsed time is shown in the lower right corner of the Rufus window.

Installation complete:
When Rufus has finished writing the USB device, the Status bar will be green filled and the word READY will appear in the center. Select CLOSE to complete the write process.

Step 3: Prepare Windows Machine for Dual-Boot
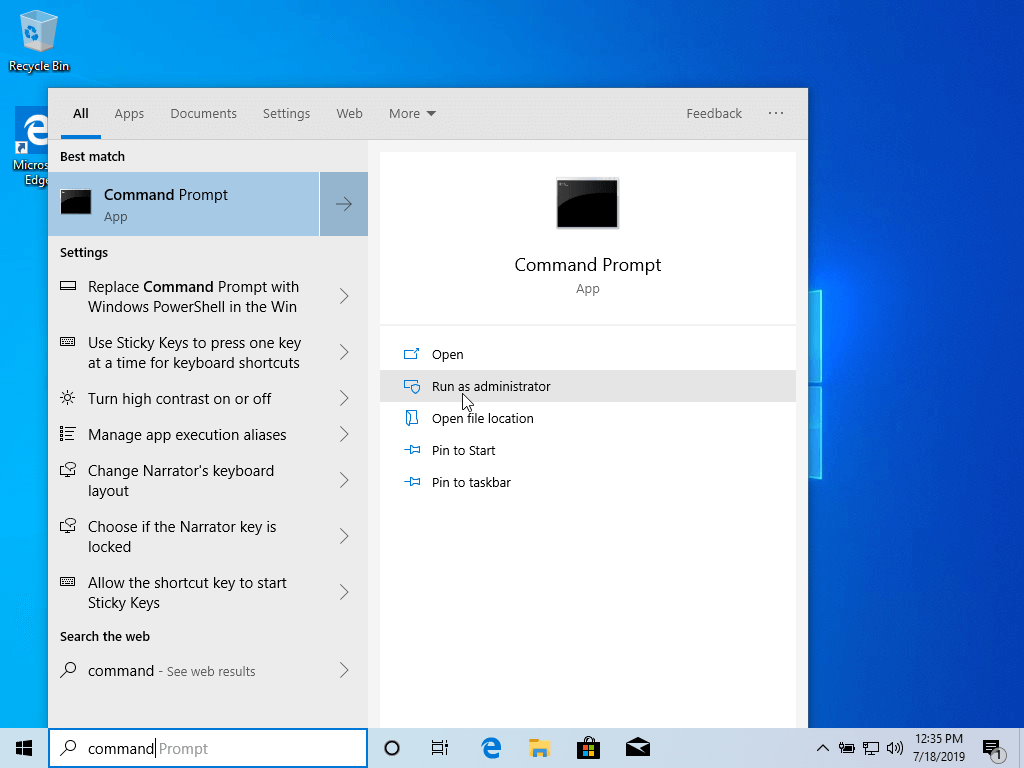
1. The first thing you need to take care of is to create free space on the computer hard disk in case the system is installed on a single partition. Log in to your Windows machine with an administrative account and right-click on the Start Menu -> Command Prompt (Admin) in order to enter Windows Command-Line.
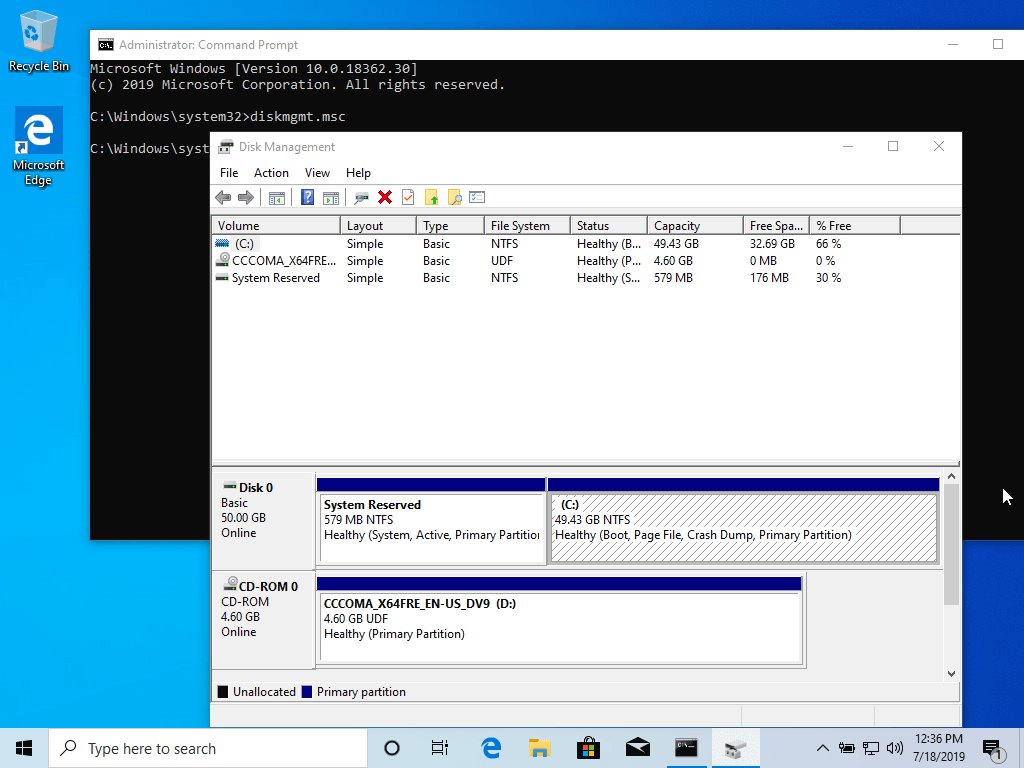
2. Once in CLI, type diskmgmt.msc on prompt and the Disk Management utility should open. From here, right-click on C: the partition and select Shrink Volume in order to resize the partition. C:\Windows\system32\>diskmgmt.msc
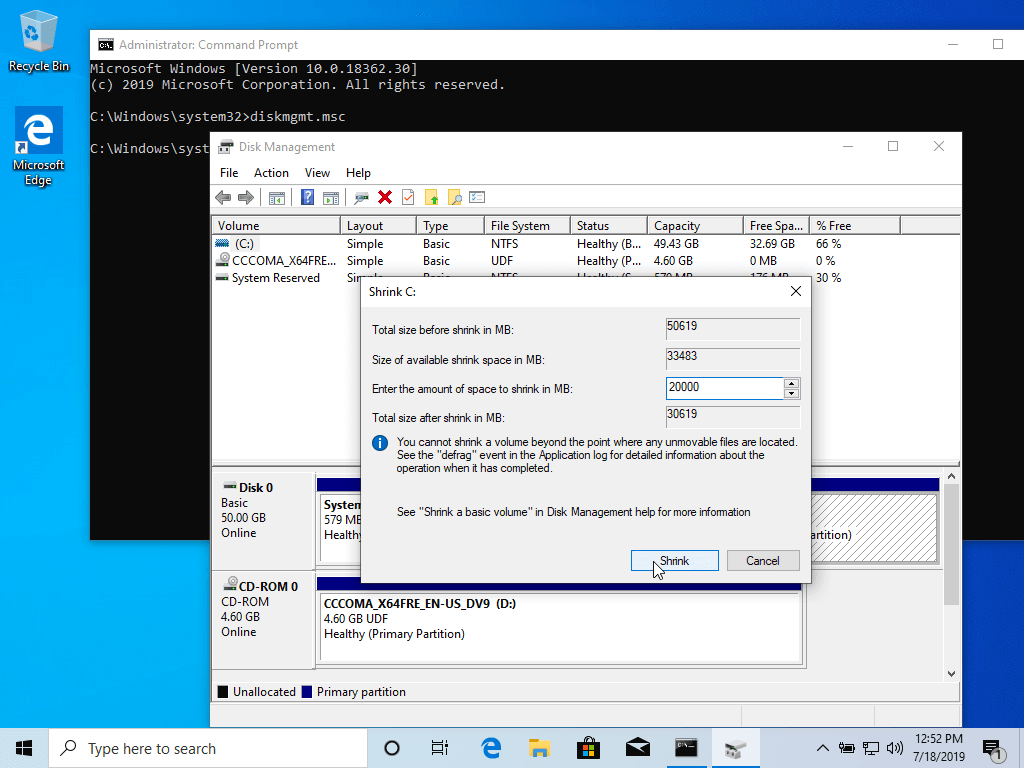
3. On Shrink C: enter a value on space to shrink in MB (use at least 20000 MB depending on the C: partition size) and hit Shrink to start partition resize as illustrated below (the value of space shrink from below image is lower and only used for demonstration purposes). Once space has been resized you will see a new unallocated space on the hard drive. Leave it as default and reboot the computer in order to proceed with the Ubuntu installation.

Step 4: Install Ubuntu with Windows Dual-Boot
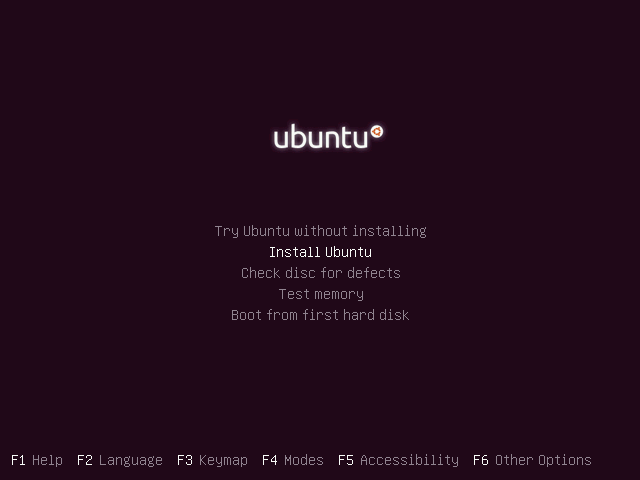
1. Now, We will be installing Ubuntu alongside with Windows dual boot (you can use any Ubuntu release for installation). Place the USB stick or DVD in the appropriate drive, reboot the machine and instruct the BIOS/UEFI to boot-up from the DVD/USB by pressing a special function key (usually F12, F10 or F2 depending on the vendor specifications). Once the media boot-up a new grub screen should appear on your monitor. From the menu select Install Ubuntu and hit Enter to continue.
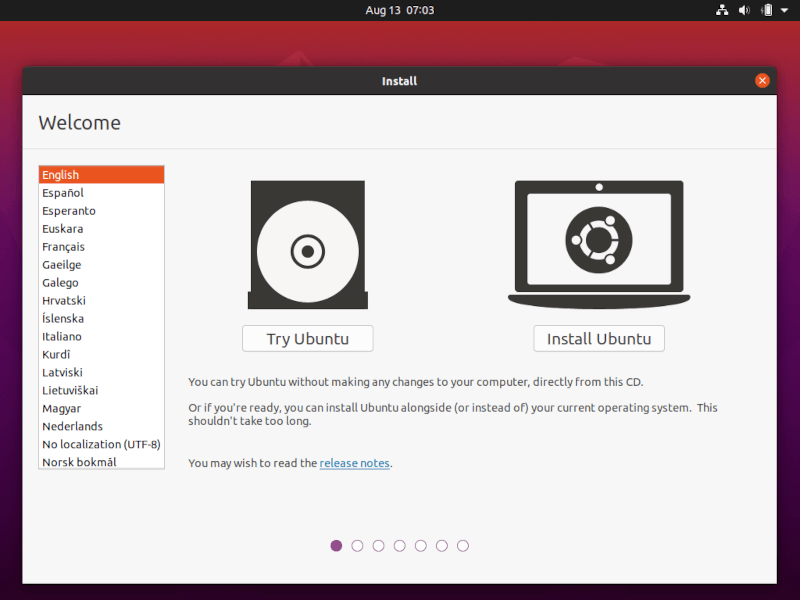
2. After the boot media finishes loading into RAM you will end-up with a completely functional Ubuntu system running in live-mode. On the Launcher hit on the second icon from top, Install Ubuntu, and the installer utility will start. Choose the language you wish to perform the installation and click on the Continue button to proceed further.
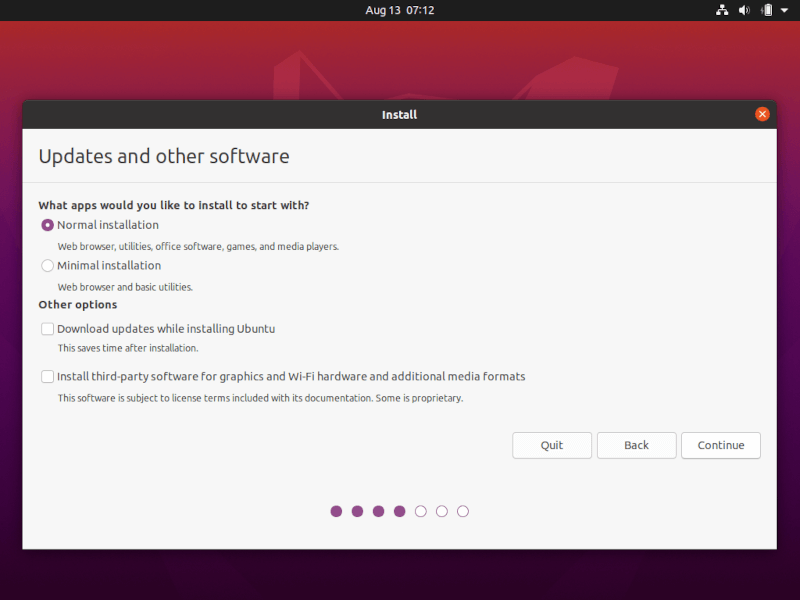
3. Next, choose the first option “Normal Installation” and hit on the Continue button again.
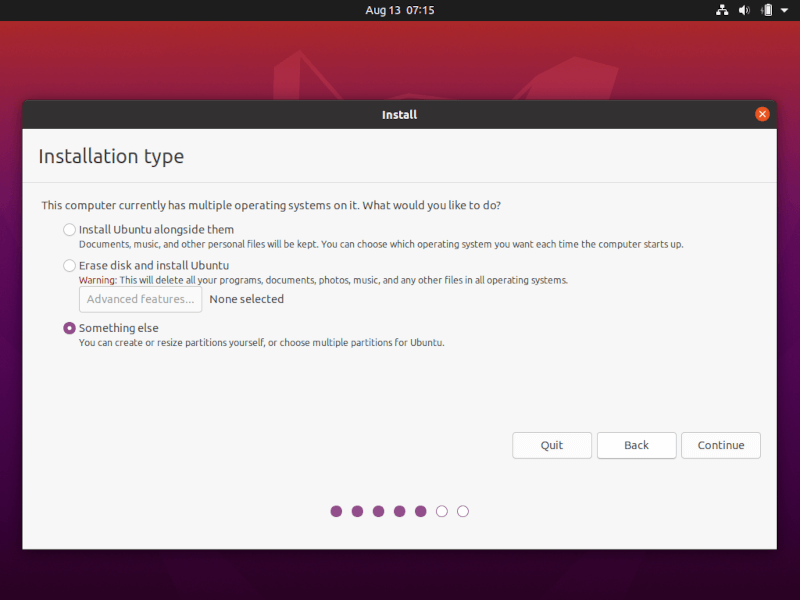
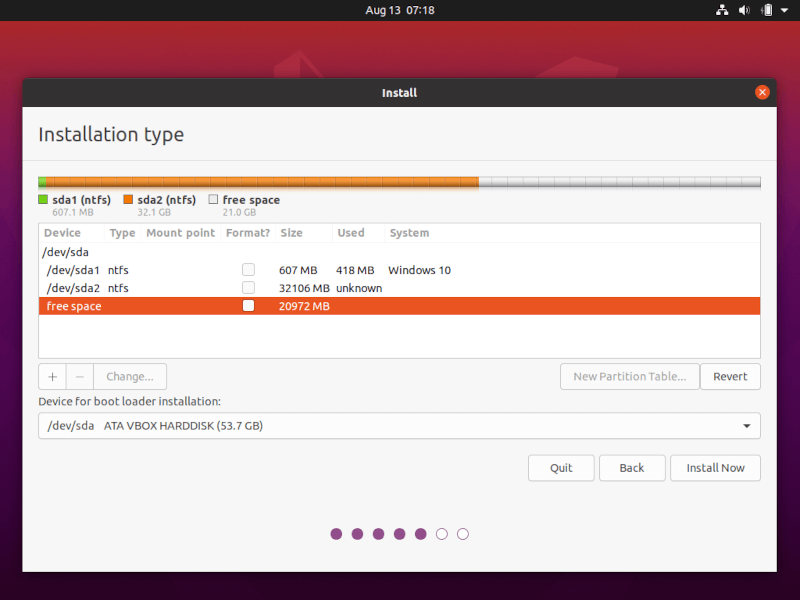
4. Now it’s time to select an Installation Type. You can choose to Install Ubuntu alongside Windows Boot Manager, an option that will automatically take care of all the partition steps. Use this option if you don’t require a personalized partition scheme. In case you want a custom partition layout, check the Something else option and hit on the Continue button to proceed further. The option Erase disk and install Ubuntu should be avoided on dual-boot because is potentially dangerous and will wipe out your disk.
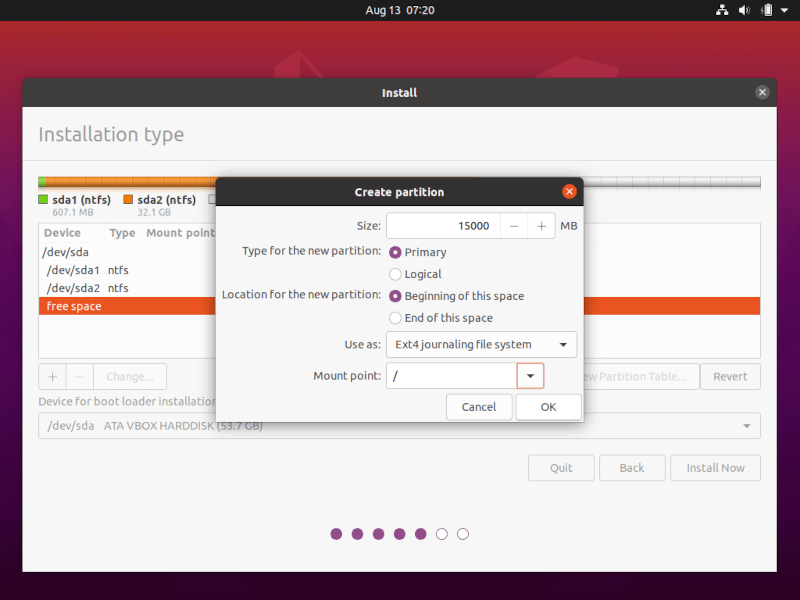
5. On this step, we’ll create our custom partition layout for Ubuntu. This guide will recommend that you create two partitions, one for root and the other for home accounts data and no partition for swap (use a swap partition only if you have limited RAM resources or you use a fast SSD). To create the first partition, the root partition, select the free space (the shrinking space from Windows created earlier) and hit on the + icon below. On partition settings use the following configurations and hit OK to apply changes:
- Size = at least 20000 MB
- Type for the new partition = Primary
- Location for the new partition = Beginning
- Use as = EXT4 journaling file system
- Mount point = /
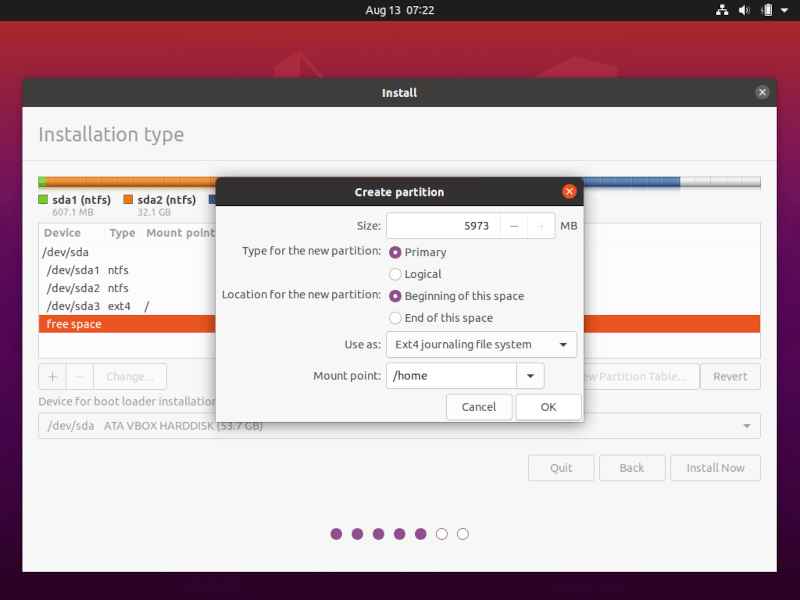
6. Create the home partition using the same steps as above. Use all the available free space left for the home partition size. The partition settings should look like this:
- Size = all remaining free space
- Type for the new partition = Primary
- Location for the new partition = Beginning
- Use as = EXT4 journaling file system
- Mount point = /home
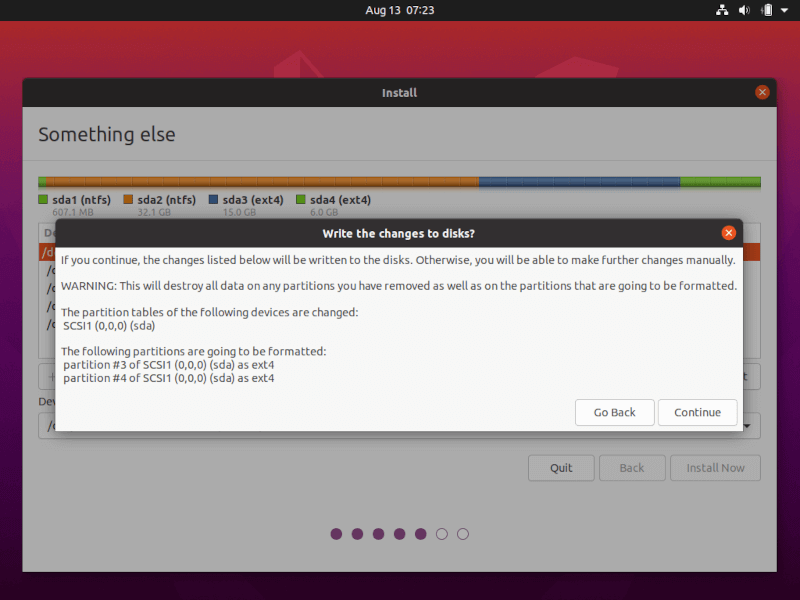
7. When finished, hit the Install Now button in order to apply changes to disk and start the installation process. A pop-up window should appear to inform you about swap space. Ignore the alert by pressing on the Continue button. Next, a new pop-up window will ask you if you agree with committing changes to disk. Hit Continue to write changes to disk and the installation process will now start.
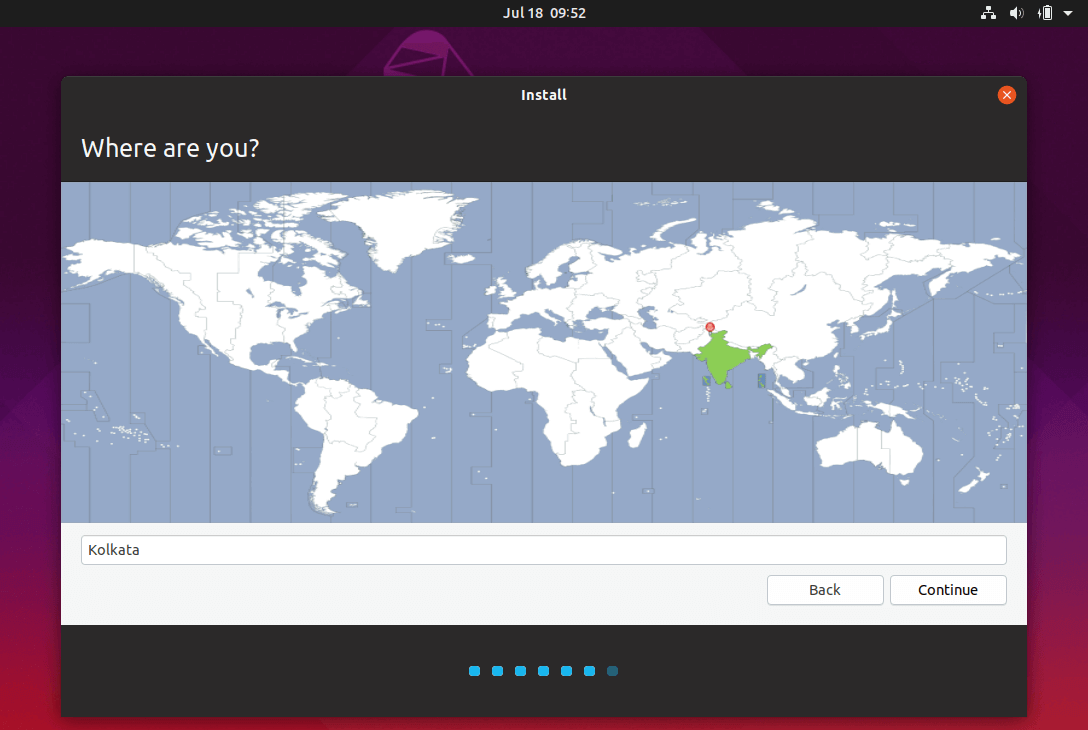
8. On the next screen adjust your machine physical location by selecting a city nearby from the map. When done hit Continue to move ahead.
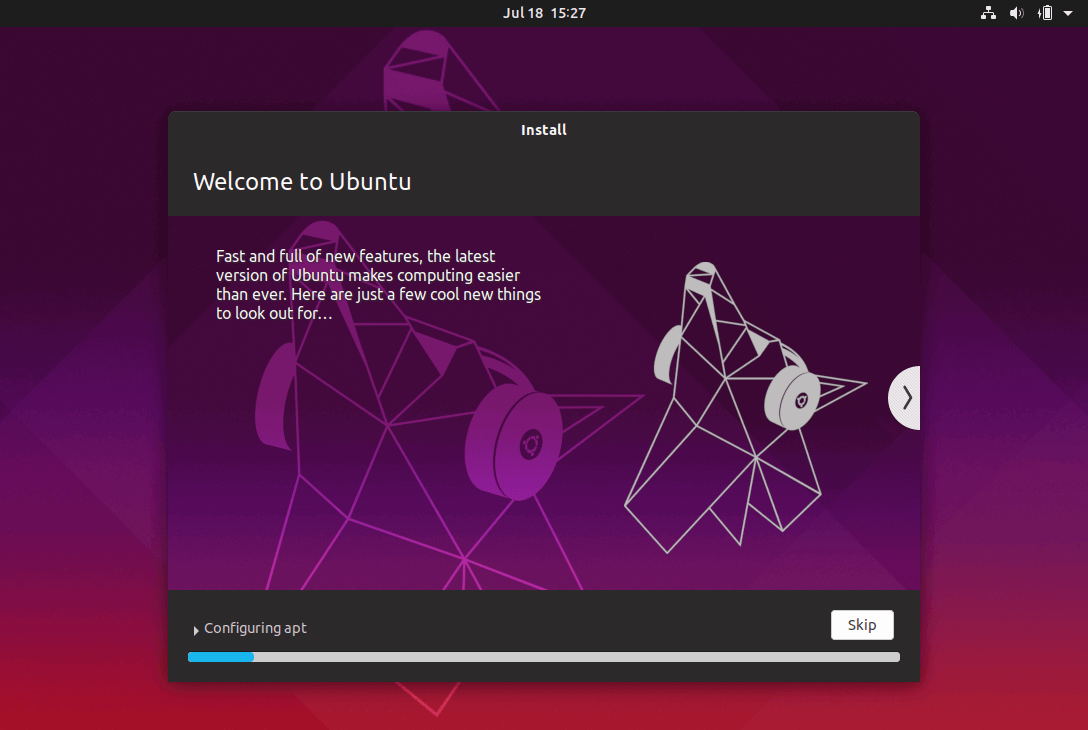
9. Pick up a username and password for your administrative sudo account, enter a descriptive name for your computer and hit Continue to finalize the installation. These are all the settings required for customizing the Ubuntu installation. From here on the installation process will run automatically until it reaches the end.

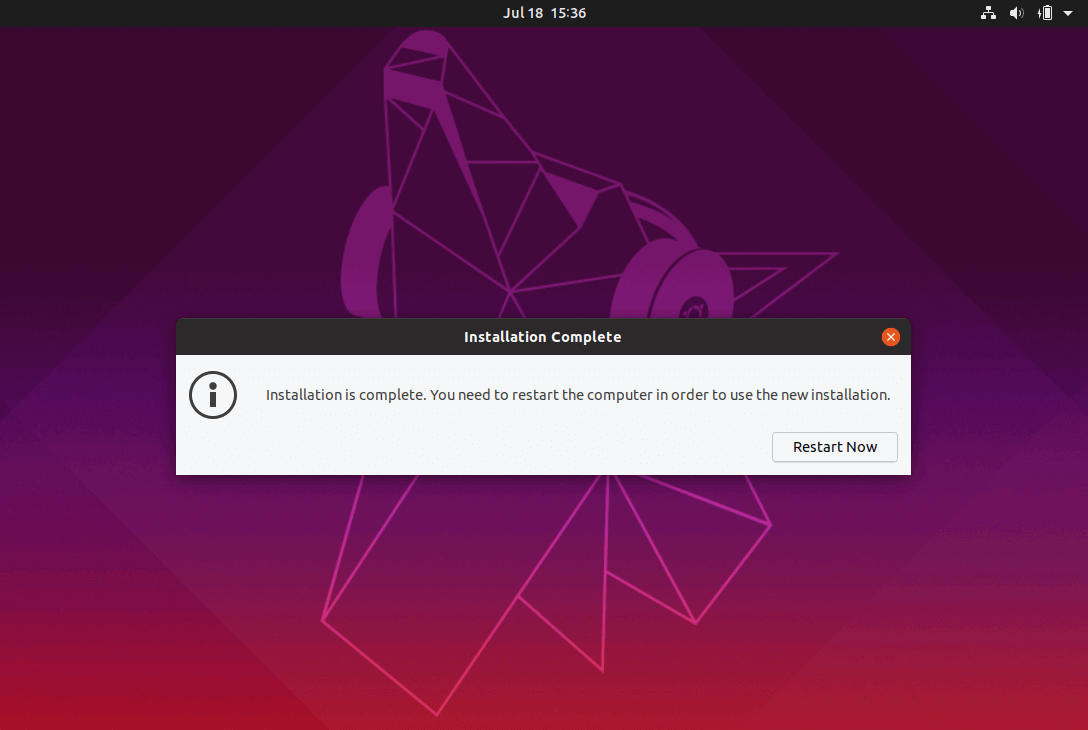
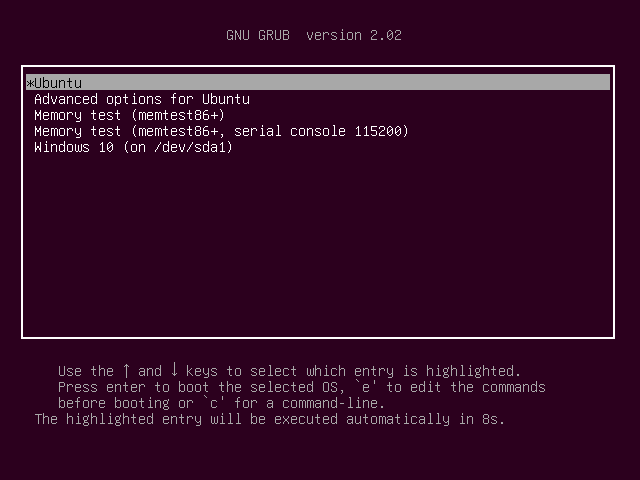
10. After the installation process reaches its end hit on the Restart Now button in order to complete the installation. The machine will reboot into the Grub menu, where for ten seconds, you will be presented to choose what OS you wish to use further: Ubuntu or Microsoft Windows. Ubuntu is designated as default OS to boot from. Thus, just press Enter key or wait for those 10 seconds timeout to drain.
11. After Ubuntu finishes loading, login with the credentials created during the installation process, and enjoy it. Ubuntu provides NTFS file system support automatically so you can access the files from Windows partitions just by clicking on the Windows volume.


That’s it! In case you need to switch back to Windows, just reboot the computer and select Windows from the Grub menu.
Thank you.
Source: https://www.tecmint.com/install-ubuntu-alongside-with-windows-dual-boot/
Your Feedback:
